
You’ve probably seen solar panels on rooftops, but there’s another option gaining popularity. Ground mount solar systems sit directly on your property’s land instead of your house. They’re becoming a top choice for homeowners who want more control over their solar setup. These systems offer unique advantages that roof panels can’t match. But they also come with specific challenges and costs you’ll need to evaluate before making any decisions.
Understanding Ground Mount Solar Systems and Their Components
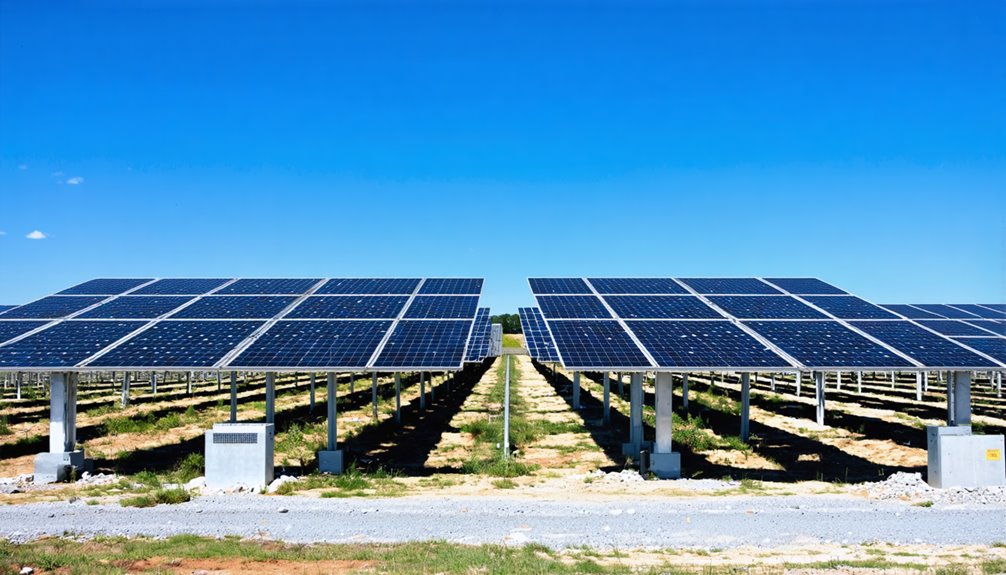
A ground mount solar system sits directly on your property’s land instead of your roof. You’ll need at least 350 square feet of space for these installations. Ground mount solar systems use metal frames to hold panels securely in place.
Two main types of solar panel mounts exist. Standard mounts use fixed frames that don’t move. Pole mounts can rotate and track the sun’s movement throughout the day. These tracking systems produce more electricity than fixed ones.
Your racking options determine how panels attach to the ground. Metal frames anchor into concrete foundations or driven posts. The frames hold panels at specific angles to catch maximum sunlight. You can adjust these angles based on your location’s latitude and seasonal changes. When selecting your system, consider factors like durability and adjustability to ensure the mounting solution meets your long-term energy needs.
Types of Ground Mount Solar Installations and Racking Options
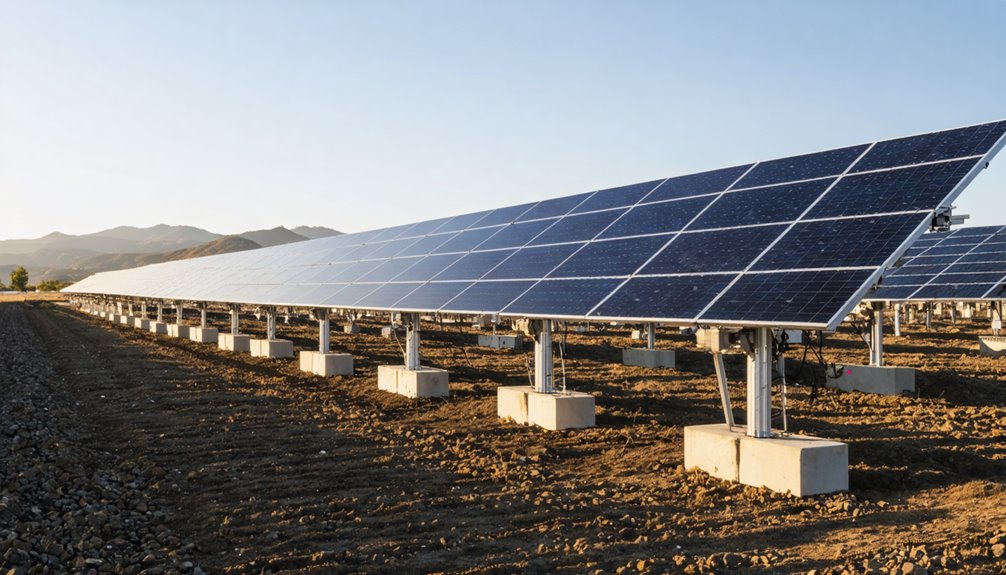
Five different ground mount solar installation types offer homeowners distinct advantages for their properties. Standard ground-mounted systems use metal frames that you can manually adjust for seasonal sunlight. They’re versatile and work on most land types.
Pole-mounted panels sit high on poles and can track the sun’s movement. They’ll boost your energy output by up to 25%. They’re perfect if you’ve got uneven land or limited space.
Fixed Tilt solar racking keeps panels at one set angle. This option’s simpler to install and costs less. Earth anchor systems don’t need ground penetration and install quickly. They’ll work in different soil types without disturbing the environment.
Ballasted systems secure frames without deep anchoring. They’re flexible and stable while meeting landscaping needs and local rules. These systems use weighted blocks similar to roof-mounted ballast solutions, providing a non-invasive installation method that protects the ground surface.
Benefits and Drawbacks of Ground-Mounted Solar Panels
When you’re considering ground-mounted solar panels, you’ll find they offer unique advantages over rooftop systems. These panels let you achieve ideal orientation and angle control, which boosts energy production. You’ll have easier access for maintenance and snow removal since they’re at ground level. This accessibility helps reduce maintenance costs over time.
However, there are drawbacks you should know about. Ground-mounted systems typically cost 10% more upfront than rooftop installations. You’ll need about 350 square feet of available space. Local zoning laws and regulations might restrict where you can install them. Some homeowners’ associations don’t allow these systems. For properties where ground mounting isn’t feasible, pole mount systems provide an alternative solution that combines ground-level benefits with smaller footprint requirements.
Despite higher initial costs, ground-mounted solar panels can save you money on electricity bills long-term. They’re especially beneficial if your roof isn’t suitable for solar installation.
Cost Analysis and Financial Considerations for Ground Mount Systems

You’ll find that ground-mounted solar systems cost more upfront than rooftop installations, with typical home systems running about $53,800 before any incentives kick in. The good news is that federal tax credits can slash 30% off that price tag, bringing your actual cost down to around $37,660. Your system’s return on investment depends on factors like local electricity rates and available rebates, but many homeowners see their systems pay for themselves within 7 to 10 years. Adding solar batteries to your ground mount system can further enhance your return on investment by storing excess energy for nighttime use and providing backup power during outages.
Installation Cost Breakdown
Ground-mounted solar systems come with a higher price tag than rooftop installations, typically costing about 10% more overall. You’ll pay around $53,800 on average for a home solar panel system before any incentives kick in. That’s a significant investment for most homeowners.
However, the federal tax credit changes the financial picture. You can claim 30% back, bringing your actual installation costs down to about $37,660. That’s a savings of over $16,000.
Your final price depends on several factors. The size of your system matters most. Local labor rates in your area also affect costs. Site conditions play a role too. Ground mounts need at least 350 square feet of space, which impacts both your upfront costs and how you’ll use your land.
ROI and Payback
Most homeowners break even on their ground-mounted solar investment within 7 to 10 years. The ROI and payback timeline depend on several factors, including local electricity rates and sun exposure.
Your ground-mounted solar systems can generate about 30.4 kWh daily with 19 panels. That’s roughly 11,100 kWh annually. If you’re paying 16 cents per kWh for electricity, you’ll save around $1,776 yearly.
After the federal tax credit, your $37,660 investment starts paying for itself immediately through reduced utility bills. The long-term savings continue well beyond the payback period. Most solar panels last 25 to 30 years, meaning you’ll enjoy free electricity for decades after breaking even.
Ground-mounted systems often produce more energy than rooftop panels because they’re positioned at advantageous angles without shading obstacles.
Installation Process and Site Preparation Requirements
You’ll need to complete several key steps before installing a ground mount solar system on your property. The process starts with checking your site’s sunlight exposure, soil type, and any shadows that might block the panels. After that, you’ll prepare the ground by clearing debris and leveling the area, then install the mounting racks that hold the panels in place. Ground mount systems come with fixed/adjustable racks that can be optimized for both flat and sloped terrain configurations.
Site Assessment and Evaluation
Before installing a ground-mounted solar panel system, property owners need to complete a detailed site assessment to determine if their location works for solar panels. This evaluation includes checking sunlight exposure and identifying trees or buildings that might create shadows. Professionals examine soil conditions through geotechnical analysis to select the right mounting system.
| Assessment Factor | What’s Checked | Why It Matters |
|---|---|---|
| Sunlight | Shade patterns | Panel efficiency |
| Soil | Stability tests | Mount selection |
| Wildlife | Animal activity | Damage prevention |
The permitting process requires homeowners to obtain local approvals and follow zoning rules. Site preparation typically needs 350 square feet of level ground. Property owners often discover wildlife concerns during assessments, as animals can damage ground-mounted systems without proper protection.
Preparation and Grading Steps
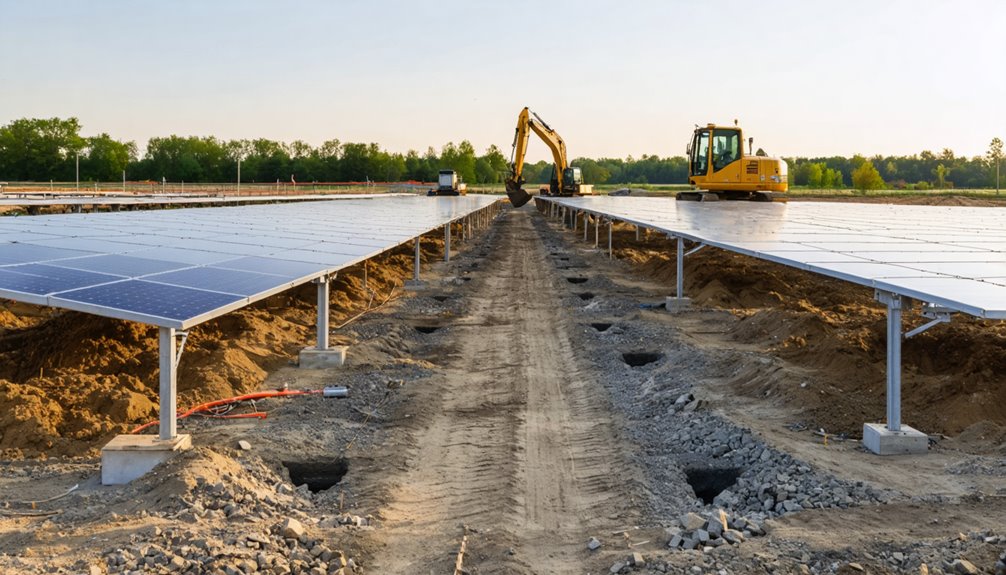
After completing the site assessment, contractors begin preparing the ground for solar panel installation. Site preparation starts with clearing debris from the designated area. Workers remove rocks, branches, and other materials that could interfere with the installation.
Grading creates a smooth, level surface for the solar panels. Contractors use special equipment to flatten uneven terrain. This step’s especially important in areas with hills or bumps.
Soil composition determines how workers will anchor the solar mounts. Sandy soil requires different anchoring methods than clay or rocky soil. Contractors test the soil before choosing the right mounting system.
Vegetation removal’s another critical step. Trees and bushes that could shade the panels must go. This guarantees maximum sunlight reaches the solar panels throughout the day.
Mounting System Installation
Once contractors complete site preparation, they’re ready to install the mounting system that’ll hold the solar panels. Ground mounting requires sturdy foundations to support the equipment. Workers typically use concrete bases or metal piles driven deep into the soil. They’ll position these anchors according to engineering specifications for the site’s conditions.
The installation process follows specific steps:
| Installation Stage | Description |
|---|---|
| Foundation Setup | Pour concrete or drive piles |
| Rail Assembly | Attach horizontal support rails |
| Frame Construction | Build vertical support frames |
| Angle Adjustment | Set proper tilt angle |
| Final Securing | Tighten all bolts and connections |
These mounting systems must withstand wind, rain, and temperature changes. Contractors guarantee each component meets local building codes before moving to the electrical work phase.
Choosing Between Ground Mount and Roof Mount Solar Systems
How do you decide between putting solar panels on your roof or on the ground? Ground-mounted solar systems cost about 10% more than roof-mounted systems. You’ll pay around $53,800 for ground panels versus $49,000 for rooftop ones before incentives.
Ground mounts need at least 350 square feet of space. They’re easier to clean and maintain since you can reach them from the ground. These systems get better airflow, which keeps them cooler and helps with ideal energy production. Ground-mounted systems also allow for adjustable panel angles that can boost solar output by up to 25% when optimized for seasonal sunlight changes.
Roof-mounted systems save yard space but might damage your roof. They’re harder to maintain and can get too hot, reducing performance. If your roof has steep slopes or shade problems, ground mounts work better for maximizing solar power generation.
Conclusion
Ground mount solar systems offer unique advantages for homeowners with available land. You’ll find these installations provide better airflow and easier maintenance than rooftop panels. They’re typically more expensive upfront and require dedicated space. Your choice between ground and roof mounting depends on your property’s layout and budget. Engineers have developed various mounting options to maximize energy production. These systems continue growing in popularity as solar technology advances and installation costs decrease over time.