
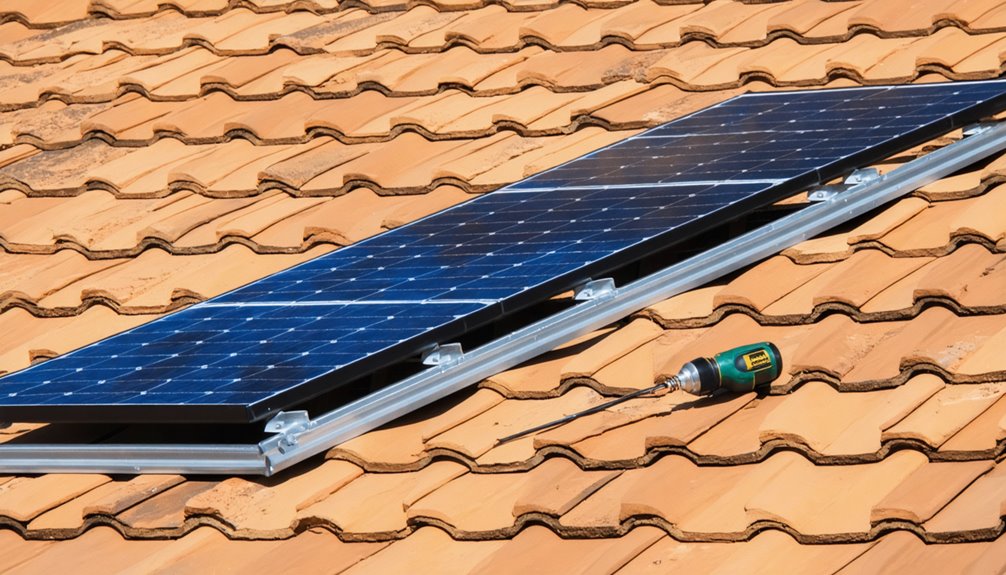
To mount solar panels on a tile roof, start by removing tiles to access underlying rafters. Use a rafter locator to mark attachment points, pre-drill holes with a 3/16 inch drill bit, and apply sealant to prevent water ingress. Install flat tile roof hooks on these marked rafters, guaranteeing proper alignment for stability. Secure hooks with screws included in the installation kit, then replace tiles carefully. Steps guarantee a stable setup and further insights await in subsequent sections.
Installation Overview of Flat Tile Roof Hooks
When installing solar panels on a tile roof, understanding the use of flat tile roof hooks is crucial to a successful installation process. The correct placement of these hooks is essential, accommodating both side and bottom mount rails. Specific models such as the FTR 9038 S14 cater to side mounting, whereas the FTR 18038 S14 suits bottom mounting requirements. Each installation kit, including 20 hooks and 40 mounting screws, provides the essentials to guarantee a secure fit. Begin by moving tiles, locating rafters, and pre-drilling holes with a 3/16 inch drill bit to prevent future leaks. Securely drive the mounting screws into the pre-drilled holes. For bottom mount rails, additional grinding might be necessary to achieve stability on uneven tile surfaces. Additionally, perform a ballast calculation to account for wind uplift and roof weight limits and verify compatibility with the chosen non-penetrating system.
Necessary Tools and Equipment
To successfully mount solar panels on a tile roof, you’ll need several essential tools and pieces of equipment, starting with a rafter locator to precisely identify where to place your solar hooks, ensuring a secure attachment. Marking tools like chalk or crayon will assist you in accurately designating the positions for pre-drilled holes, while a drill with a 3/16 inch bit is necessary for creating these holes, enabling the installation of mounting screws. Additionally, you’ll require a reliable sealant to prevent water from seeping through these openings, and possibly a grinder to adjust tile surfaces for a seamless fit when batons are absent. Additionally, ensure your bracket selection complies with wind and snow ratings relevant to your climate.
Essential Installation Tools
Proper installation of solar panels on a tile roof necessitates specific tools and equipment to secure both efficiency and safety. A rafter locator allows you to accurately identify the placement of rafters, essential for securely attaching solar panel hooks. Utilize a chalk or crayon to mark precise locations on the roof tiles where hooks will be installed, enhancing accuracy during setup. Employ a drill, equipped with a 3/16 inch bit, to pre-drill holes into the roof tiles, facilitating smooth insertion of mounting screws. Filling these holes with sealant secures waterproofing, preventing potential leaks. Additionally, a grinder might be necessary to smooth uneven tile surfaces, particularly when installing hooks onto bottom mount rails without batons, thereby providing a more stable installation platform.
Equipment for Tile Roofs
Mounting solar panels on a tile roof requires several important tools and specific equipment to secure a successful and safe installation, effectively integrating the solar system into the existing roof structure. Utilize a rafter locator to confirm proper alignment, and mark with chalk or crayon for precision. A drill with a 3/16 inch bit is vital for pre-drilling holes, minimizing potential damage to tiles. Employ a grinder to modify tiles if needed, particularly when encountering obstructions. Installation kits commonly include 20 hooks and 40 mounting screws, offering ample resources for affixing panels securely. Always wear safety gear, such as gloves and eye protection, to safeguard against injury.
| Essential Tools | Key Equipment |
|---|---|
| Rafter Locator | Installation Kit |
| Chalk/Crayon | Grinder (if necessary) |
| Drill with 3/16 inch bit | Safety Gear |
Drill and Sealant Use
For effective solar panel installation on tile roofs, the use of a drill equipped with a 3/16 inch bit is indispensable for pre-drilling holes essential for anchoring solar roof hooks without compromising tile integrity. After drilling, sealant application within each pre-drilled hole is vital to prevent water leaks, guaranteeing a weather-tight installation. By filling these holes with sealant before inserting screws, you enhance the system’s durability against harsh weather conditions. In some cases, employing a grinder may be necessary to adjust uneven tiles or those lacking batons, allowing a proper fit over the hook. Ensure thorough sealing around the screws after installation to maintain the roof’s integrity, averting potential water ingress and prolonging the effectiveness of the solar panel bracket installation.
Steps for Preparing the Installation Area
When preparing the installation area for solar panels on a tile roof, start by clearing the intended mounting space; remove any tiles to guarantee an unobstructed workspace. Once you’ve got a clear area, use a rafter locator to pinpoint and mark the rafter positions beneath the tiles, assuring secure attachment points for the hooks. Adjust the solar roof hook’s height to match your system’s specifications, providing a precise fit with the mounting rails. Pre-drill holes with a 3/16 inch drill bit, which not only simplifies the installation but also assures accuracy. To maintain the roof’s integrity and prevent water ingress, apply sealant around the pre-drilled holes.
Always verify wind uplift limits with a qualified engineer.
| Task | Tool Needed | Purpose |
|---|---|---|
| Remove tiles | Hands/Tools | Clear workspace |
| Locate rafters | Rafter locator | Secure hook placement |
| Adjust hook height | Measuring tools | Assure fit with rails |
| Pre-drill holes | 3/16 inch drill bit | Ease and precision |
| Apply sealant | Sealant gun | Prevent water ingress |
Installing the Roof Hooks
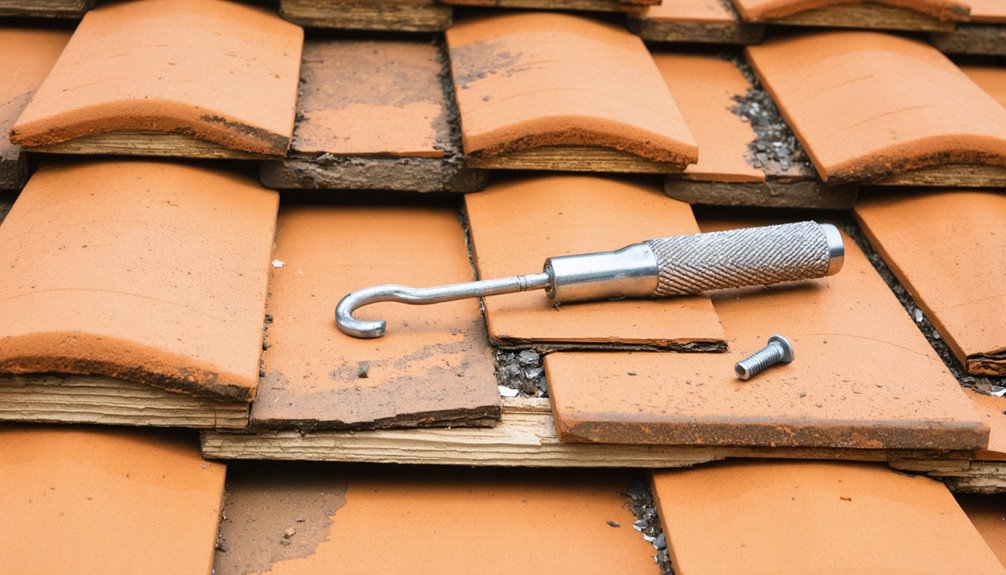
Begin by ensuring that the pre-drilled holes for the roof hooks are accurately aligned over the located rafters, as this is essential for a secure installation. With the rafters located, use a 3/16 inch drill bit to create the necessary holes, ensuring they’re perfectly placed. Apply a suitable sealant within these holes to safeguard against water infiltration, maintaining the roof’s integrity. Once this is completed, securely position the flat roof hook, ensuring it rests firmly against the surface. Drive the mounting screws through the hook into the pre-drilled holes, achieving a firm attachment. If tiles lack batons, you might need to grind the marked areas to fit the hook adequately. Verify the stability of the installed hooks before replacing any tiles. Ensure the sealant remains compatible with tile materials and flashing to maintain waterproofing integrity.
Ensuring Stability and Security
Guaranteeing the stability and security of your solar panel installation on a tile roof requires meticulous attention to detail, as the integrity of the roof and the efficiency of the solar system depend on it. Ballast mounting for flat roofs provides a non-penetrating mounting option that reduces roof penetration risks. Properly securing solar roof hooks to the rafters is vital because it assures weight distribution across the roof structure, maintaining stability. Utilize recommended tools like a rafter locator and a drill with a 3/16 in bit to install the hooks with precision. Pre-drill holes and apply sealant to prevent water infiltration, safeguarding roof integrity. After installing the solar hooks, confirm stability by securely driving in the mounting screws. Finally, for uneven tiles, grind the marked areas, allowing the bottom mount rails to fit snugly and withstand windy conditions.
Considerations for Bottom Mount Rail Installations
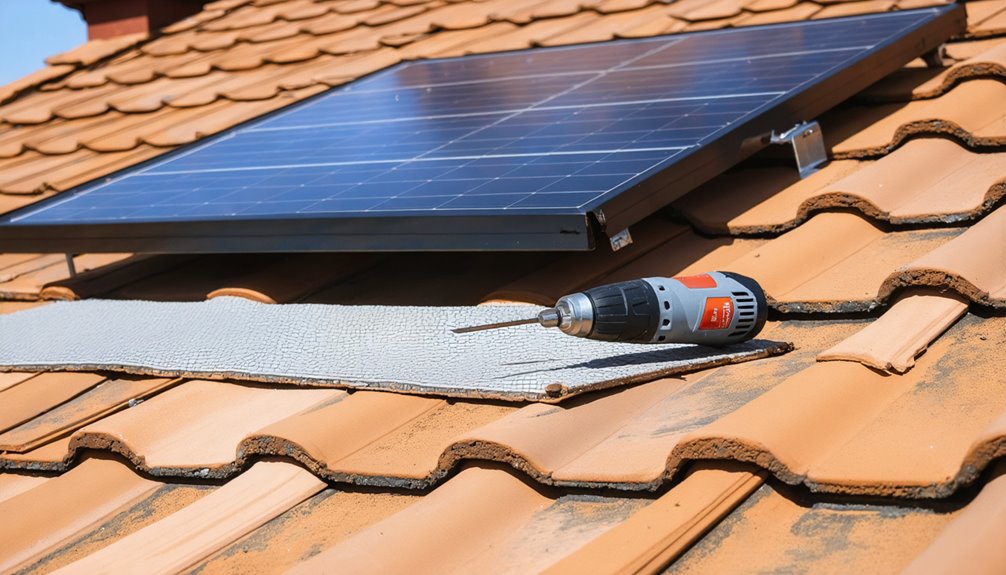
When installing bottom mount rails, you must verify there are no batons present on the tiles, as this may require grinding to achieve a precise fit; it is vital to mark the edges of the hook on uneven tile surfaces before removing them for grinding, thereby assuring accuracy during alignment. The process involves reattaching tiles carefully after grinding the marked areas, making sure they fit securely over the hooks. In addition, filling any pre-drilled holes with sealant is critical before securing the hooks to prevent water penetration and guarantee a stable installation.
Grinding for Tile Fit
Installing solar panels on uneven tile surfaces often necessitates precise preparations, particularly when using bottom mount rails. To guarantee a proper fit over the hook, begin by marking the tile where the hook will sit. Use a grinder to remove material from these marked areas, accommodating the solar roof hook securely. It’s critical to grind carefully to maintain stability and avoid interference with adjacent tiles. Reinstall the modified tile over the hook, guaranteeing it sits level without protrusion. Always assess tile compatibility with grinding to avoid structural damage and preserve roof aesthetics. By paying close attention to these details, you can achieve a flush installation that supports the panel’s weight and function while maintaining the roof’s integrity.
Ensuring Proper Hook Alignment
Achieving proper hook alignment on a tile roof is essential for the successful installation of bottom mount rails, particularly due to the uneven surfaces and structural peculiarities of such roofs. Identifying the absence of batons is vital, as they impact how you position the hooks. Mark the edges on uneven tile surfaces prior to installation, providing a clear guide for necessary grinding adjustments. Grind the marked areas after removing the tiles to produce a level surface that securely accommodates the hook. Afterward, reinstall the ground-down tiles carefully, ensuring they align well over the hooks without compromising roof integrity or water drainage. Finally, always check the alignment and stability to confirm the hooks are mounted securely, capable of supporting solar panels.
Replacing the Roof Tiles
Before starting the process of replacing roof tiles on a tile roof, initiate by meticulously removing the tiles surrounding the damaged area to minimize additional breakage and guarantee a precise fit for the replacement tiles. Carefully inspect the underlying structure for any signs of damage, such as rotting wood or mold, which must be addressed prior to installing new tiles to ascertain the roof’s longevity. When selecting replacement tiles, amplify uniformity by choosing ones that match the existing tiles in color, style, and dimensions. Install the new tiles by sliding them into place, making certain they interlock securely with adjacent tiles to preserve the roof’s integrity. Finally, check for stability and replace any missing or broken tiles nearby to avert potential leaks or subsequent damage.
Additional Resources and Where to Find Them
A multitude of resources are available to assist in the successful installation of solar panels on tile roofs, helping you guarantee each step of the process is executed with precision and efficiency. For purchasing flat tile roof hooks and installation kits, visit www.solarroofhook.com where you can find both side and bottom mount rail options. Each kit provides 20 hooks and 40 mounting screws, making certain you have ample materials for securing solar panels. Stay updated on new resources and installation tips by following the social media links on the site. Additionally, explore the online resources for specific guidance. It’s essential to use recommended tools, such as a rafter locator and a drill with a 3/16-inch bit, to guarantee a secure and stable installation.
Conclusion
Successfully mounting solar panels on a tile roof requires careful preparation and selection of compatible components, particularly flat tile roof hooks that match your specific roof configuration. The installation process must prioritize structural integrity through proper use of tools like drills and torque wrenches, precise placement of roof hooks, and secure mounting of bottom rails while ensuring tiles are correctly replaced to maintain weather protection. Following manufacturer guidelines and consulting industry resources provides essential technical support throughout the installation process. Solocity Global serves as a trusted exporter of solar panel mounting systems, providing high-quality, standards-compliant mounting solutions to clients worldwide for various roofing applications including tile installations.