
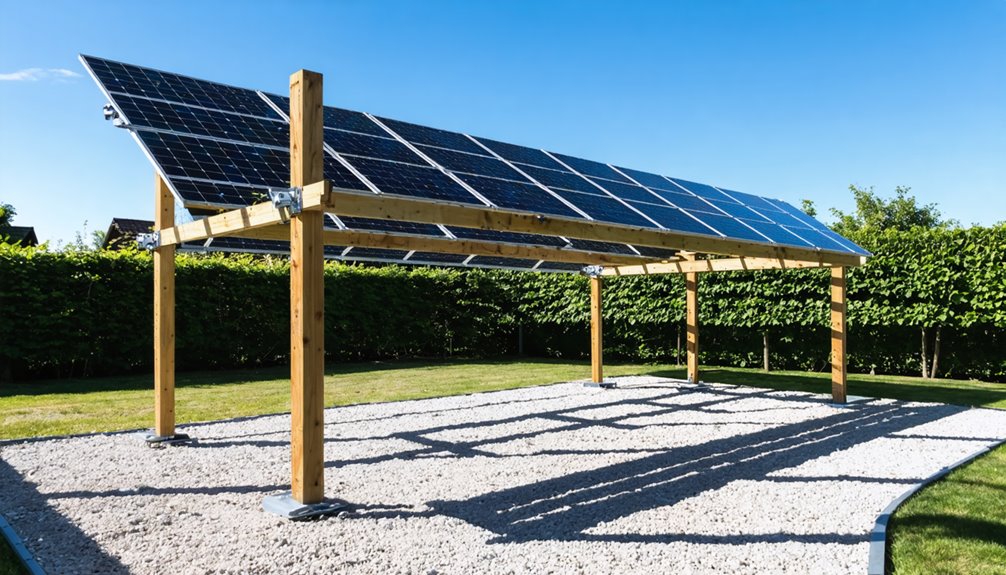
To build your own solar panel mount, you’ll need materials like pressure-treated 4×4 posts, 2x6s, and Unistrut. Begin by choosing a site with an unobstructed southern sky and clear debris to prepare the terrain. Set your posts accurately, using double 2x6s for stability, and align Unistrut at a 29.4-degree angle for maximum solar capture. Verify the setup withstands wind and snow loads, and integrate circuitry for efficient energy transfer. Explore more for cost-effective assembly steps.
Project Overview
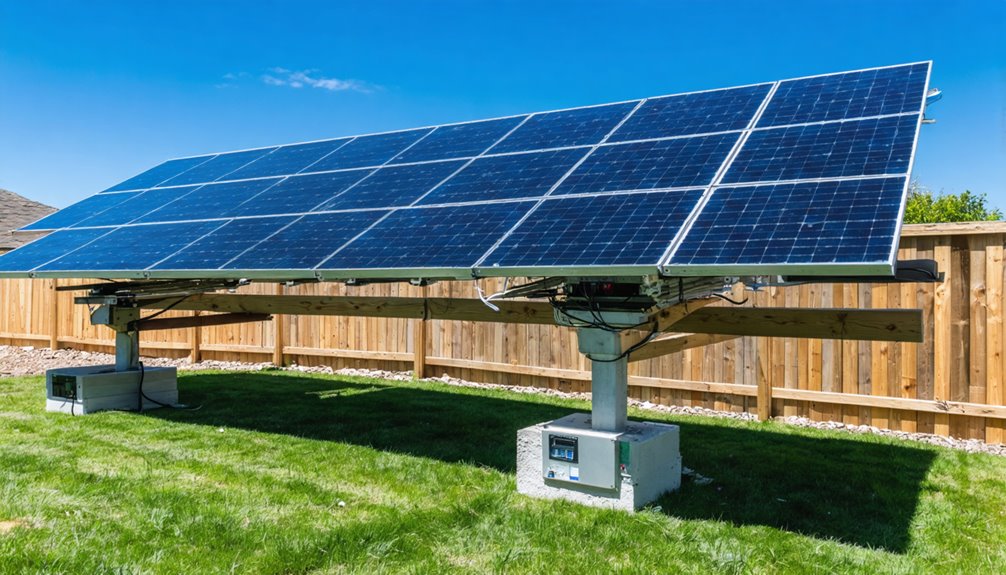
While starting on the DIY Solar Panel Mount project, you’ll aim to construct a robust 3kW solar array, essential for powering your mini split air unit—specifically, the EG4 brand’s 24,000 BTU heat pump, ensuring self-sufficiency in energy production. Incorporating basic structural engineering considerations can improve the longevity and safety of your ground-mounted array. Utilizing seven 410W solar panels, this solar power system is carefully planned for efficiency and durability. By implementing ground mounts constructed from pressure-treated 4×4 posts and 2x6s, you achieve not only a sturdy foundation but also the potential for future expansion to support up to 15kW of solar panels. These mounts are angled at 29.4 degrees to maximize sunlight capture, guaranteeing peak solar performance. Additionally, the old fuse box is replaced with circuit breakers, aligning with the electrical requirements for a seamless integration.
Selecting the Right Location
Building a solid foundation for your DIY Solar Panel Mount project involves more than just physical construction; it requires strategic planning of the installation location to maximize efficiency and output. Make certain your chosen site provides an unobstructed view of the southern sky, essential for ideal solar exposure. The solar array’s angle matters too; aim for an ideal tilt like 29.4 degrees to enhance energy capture. Consider the potential shadows from nearby trees, buildings, or debris, which could impede sunlight reach. Additionally, evaluate soil and land conditions to verify they’re stable and level for installation of the solar array, considering accessibility for maintenance and future expansion, as this will guarantee consistent performance and ease of upkeep. Additionally, ground-mounted installations offer greater siting flexibility to optimize layout and orientation for higher energy production tracking systems.
Preparing the Site
Start by clearing the land to guarantee a clean and unobstructed site for your solar panel installation, removing debris and trimming any trees that could hinder sunlight exposure, with assistance from friends or local experts to enhance safety and efficiency in this process. If your roof isn’t ideally oriented for solar energy capture, consider a ground mount and address any electrical infrastructure needs, like upgrading your fuse box to modern circuit breakers that align with the requirements of your mini split air unit, to guarantee full compatibility and performance. Also factor in standoff height and maintenance access requirements to ensure safe under-panel clearance and comply with local setback rules. These preparatory steps will help you create a favorable environment for your solar array, maximizing energy generation and guaranteeing the longevity and effectiveness of your installation.
Land Clearing Process
Before beginning the installation of your solar panel mount, it’s crucial to properly clear the land to guarantee an unobstructed southern sky view, which is essential for peak solar exposure. Commence by evaluating the area, identifying trees, dirt piles, and debris obstructing the view. Enlist help from friends to safely trim any foliage and remove large obstacles impeding the installation. Ascertain all debris is cleared, establishing a flat, stable surface capable of supporting the solar array’s weight, minimizing complications.
| Task | Importance |
|---|---|
| Evaluate the area | Identifies obstructions |
| Clear debris and level | Guarantees stability and avoids issues |
| Final inspection | Confirms readiness for installation |
Align the site with the 29.4-degree panel angle for peak exposure, and consider electrical proximity related to any necessary connections.
Tree Trimming Assistance
As you prepare the site for your solar panel installation, addressing any tree obstructions becomes a critical step in enhancing the system’s solar exposure and efficiency. Verify you trim or remove trees obstructing the southern sky, as maximizing exposure to this area maximizes energy production. Engaging friends or hiring local professionals for trimming is advisable, given the need for specialized tools and safety measures. Focus efforts on trees blocking sunlight between 9 AM and 3 PM, when solar production peaks, to guarantee efficiency. Additionally, clearing debris and dirt piles prevents potential shading on your panels. After trimming, document sunlight changes to confirm peak conditions for your solar array, maintaining a record of adjustments to validate improvements in solar access.
Fuse Box Upgrade
Upgrading your existing fuse box to a modern circuit breaker system is a fundamental step in preparing your site for efficient solar energy integration, particularly when planning to connect it with a mini split air unit. The shift involves replacing outdated components to guarantee compatibility with the air unit’s specific electrical requirements. Equip your system with circuit breakers capable of managing the 3kW solar array’s power output safely. Adhering to local electrical codes and regulations, the installation must also incorporate appropriate wire gauge and connectors to minimize voltage drop and support the electrical load effectively. Engage professionals with electrical expertise to facilitate the upgrade, enhancing safety and efficiency throughout the process. This meticulous approach guarantees a seamless and secure energy setup.
Constructing the Ground Mount System
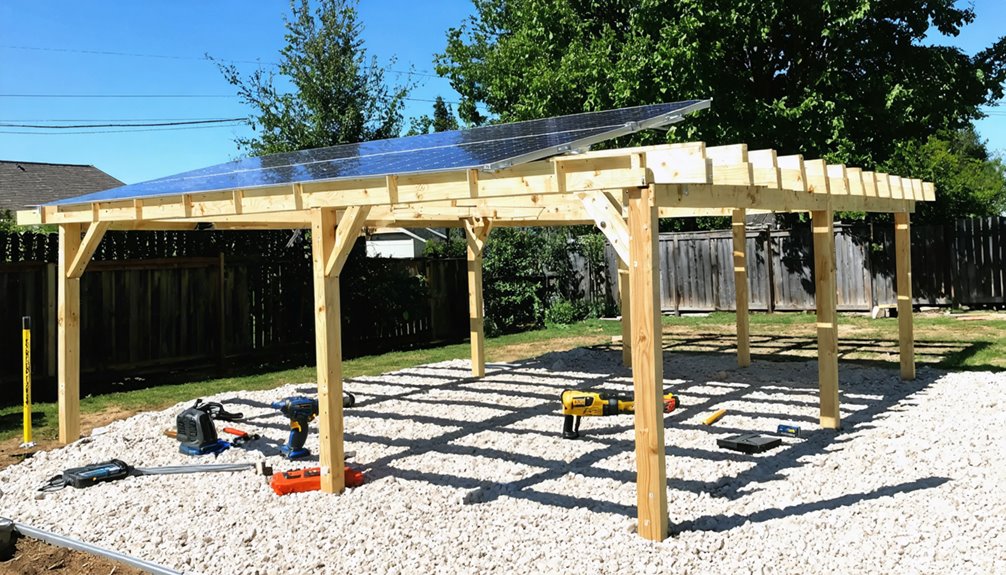
To construct your ground mount system, you’ll need materials like pressure-treated 4×4 posts, 2x6s, Unistrut, and the necessary hardware, as well as tools such as a power drill, level, and measuring tape. Begin by arranging the ten 4×4 posts in a sturdy front and back configuration, ensuring they’re precisely spaced to provide best stability for future expansion up to 15kW. Follow with the installation of double 2x6s to reinforce the mount’s strength, allowing you to position the Unistrut at the optimal 29.4-degree angle for maximum solar efficiency. Additionally, confirm the local wind and snow load requirements and adjust the mounting layout accordingly structural loads to ensure long-term stability.
Materials and Tools Needed
While installing a robust ground mount system for your DIY solar panel project, you’ll need a precise selection of materials and tools to ascertain structural integrity and efficiency. Begin with pressure-treated 4×4 posts for vertical support, employing at least five for both the front and back, along with 2x6s to guarantee horizontal stability. Utilize Unistrut to securely position your solar panels at a 29.4-degree tilt, maximizing solar exposure. For added reinforcement, integrate double 2x6s, enhancing strength against high wind conditions. Equip yourself with essential tools including a saw for precise wood cuts, a drill for secure assembly, and a level for proper alignment. Strategically design with future expansion in mind, allowing room for a potential 15kW system upgrade.
Assembly Process Steps
Once you’ve gathered all necessary materials and tools, begin assembling the ground mount system by securely anchoring the pressure-treated 4×4 posts in the ground, positioning five posts in both the front and back to establish a robust framework. Confirm each post is level and firmly set to withstand various weather conditions, as this stability is essential for the entire structure. Next, use double 2x6s for the horizontal structure, enhancing durability where the solar panels will be mounted. Integrate Unistrut into this setup to hold the panels, angling them at approximately 29.4 degrees to optimize solar exposure. Design with the future in mind by allowing for scalability, building capacity for up to 15kW solar power installation, and so accommodating potential power needs growth efficiently.
Mounting the Solar Panels
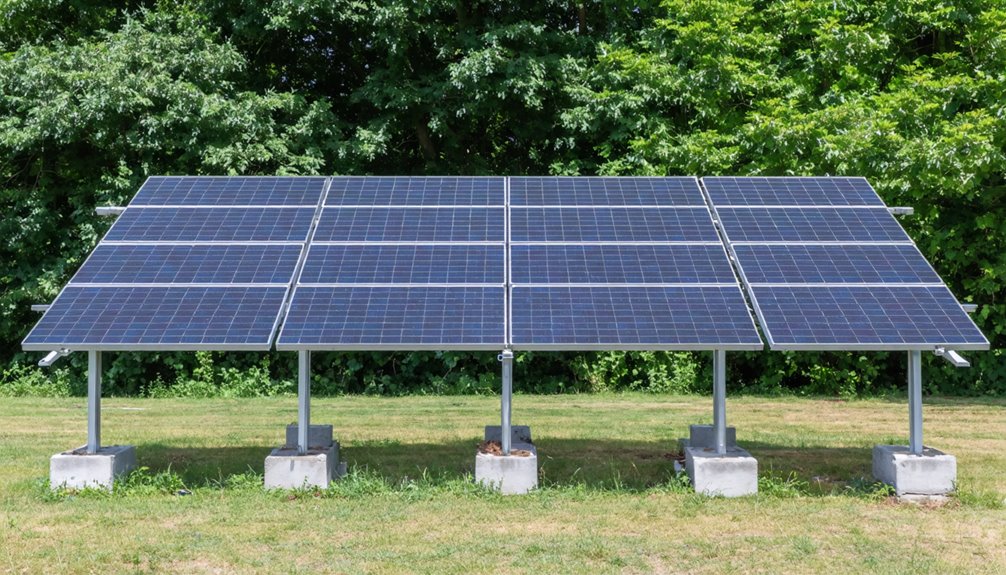
Constructing a robust solar panel mounting system starts with employing pressure-treated 4×4 posts and 2x6s to create a durable ground mount, essential for guaranteeing the stability required to support solar panels effectively. Start by arranging five posts in each the front and back, then incorporate double 2x6s to enhance strength. Mount the solar panels at a 29.4-degree angle using Unistrut to maximize exposure, guaranteeing efficient solar energy capture. Design the system for future expansion, considering potential needs to increase power generation. Conduct wind testing, verifying that your mount withstands gusts up to 50 mph.
| Component | Purpose |
|---|---|
| 4×4 Posts | Structural Support |
| 2x6s | Stability and Strength Enhancement |
| Unistrut | Angle Adjustment and Panel Attachment |
| Angle (29.4°) | Maximum Solar Exposure |
| Wind Testing | Guarantees Durability in Severe Weather |
This system is designed for future expansion to accommodate higher output in the future.
Wiring and Testing the System
Having established a secure solar panel mount, attention now turns to wiring and testing the system, guaranteeing full operational efficiency. Begin by connecting the solar panels in series to achieve around 250V DC; verify correct polarity to prevent system damage. Use temporary wire layouts during initial testing, allowing functionality confirmation before trenching for conduit installation. Regularly test the panel’s voltage output during peak sunlight hours to guarantee the system meets its expected electricity generation targets. After installation, assess the system’s structural integrity by verifying it withstands strong winds, specifically gusts over 50 mph. Finally, post-testing, plan a meticulous wiring setup to mitigate potential hazards and maintain organization within your solar power system, ultimately supporting both safety and operational effectiveness.
Managing Costs and Resources
While initiating a DIY solar panel project, managing costs and resources effectively can greatly enhance budgetary efficiency and long-term sustainability of the installation. Opt for building a DIY ground mount, considerably reducing expenses compared to commercial options, and conveniently bypassing the need for concrete foundations. Using pressure-treated wood guarantees a durable, weather-resistant structure, minimizing high material costs. Choose a customizable, expandable design, enabling an initial 3kW system investment with plans for a future upgrade towards 15kW capacity. Leverage local resources, involving friends for labor in tasks like tree trimming and electrical work, further decreasing labor costs and expediting the installation. Source materials from reputable suppliers such as Signature Solar, maintaining quality, while providing budget-friendly options for your solar setup.
Tips for Ensuring Stability
To guarantee stability in your DIY solar panel mount, it’s essential to focus on both the design and the materials used, which will help the structure withstand environmental stresses over time. Start by selecting pressure-treated 4×4 posts for vertical supports, ensuring long-term durability and weather resistance. Strengthen your system with double 2x6s, particularly if you’re in a windy area. The mounting angle should be set at approximately 29.4 degrees to balance ideal sunlight exposure with structural integrity. A robust ground mount system secured with ten posts, five on the front and five on the back, is vital for resisting high wind loads. This configuration has proven to endure gusts exceeding 50 mph, ensuring your solar panels remain stable and effective.
Expanding Your Solar Power Capacity
As your energy needs grow, expanding your solar power capacity becomes an efficient way to harness more renewable energy while maximizing the utility of your existing infrastructure. A ground mount system designed for future expansion allows you to increase capacity from 3kW to potentially 15kW by adding panels. Ascertain the structure remains stable with double 2x6s and ample support posts to withstand weather without performance issues. Plan expansions carefully, rating the electrical system and circuits for increased output and choosing an inverter that can manage added power. Install panels at an ideal 29.4-degree angle to maximize energy capture. Strategic placement and grounding should consider sun exposure and maintenance accessibility, enhancing overall solar production and efficiency.
Conclusion
Successfully constructing a DIY solar panel mount requires thorough site preparation, precise system construction, and careful panel installation, ensuring ideal solar exposure and system efficiency. By meticulously managing your budget, selecting durable materials, and adhering to structural guidelines, you can achieve a cost-effective solar solution. Regular testing and system monitoring are essential for maintaining performance and safety, while expanding capacity may involve scaling the existing system to meet long-term energy needs.
For those seeking professionally engineered mounting solutions, established suppliers offer an alternative to DIY construction. Solocity Global serves as a trusted exporter of solar panel mounting systems, providing high-quality, standards-compliant mounting solutions to clients worldwide.