
You’re seeing solar panels on more rooftops across America than ever before. Last year, residential solar installations hit record numbers, with mounting systems playing a vital role in their success. These specialized brackets and rails must withstand decades of weather while supporting expensive equipment. But there’s more to roof mounting than meets the eye—from hidden structural challenges to surprising code requirements that can derail projects.
Essential Components of Solar Panel Roof Mounting Systems
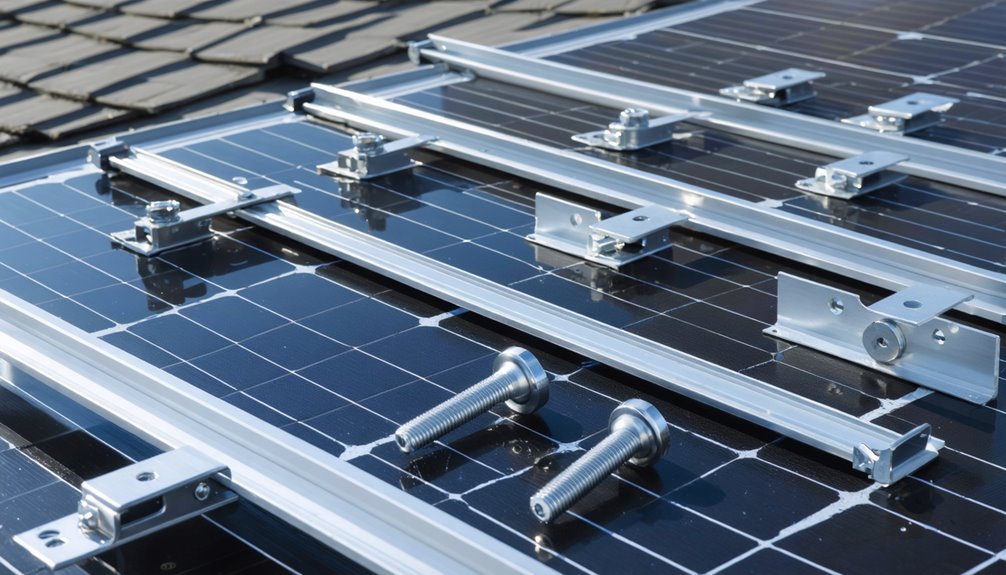
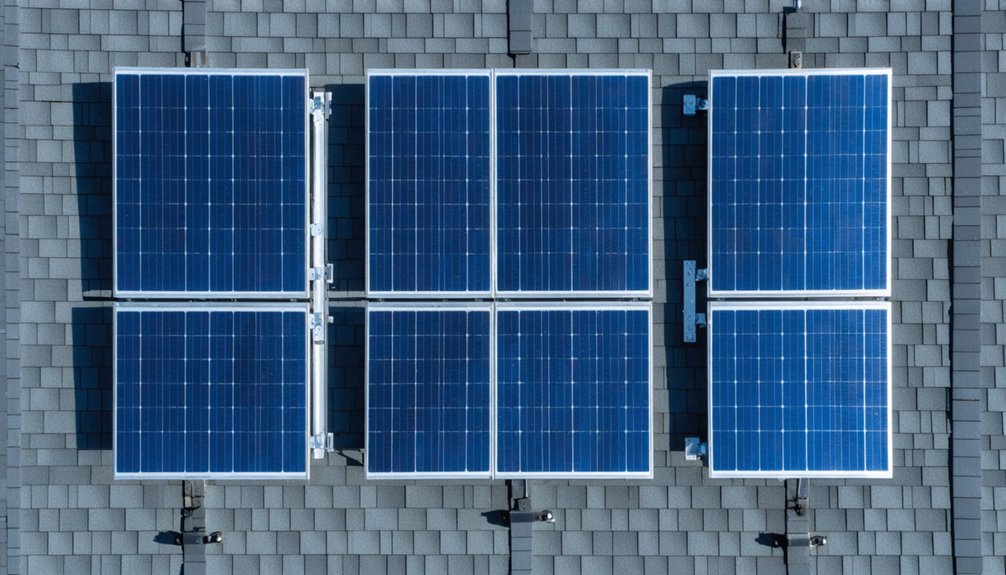
Components make up the backbone of any solar panel roof mounting system. You’ll find four main parts in these solar mounting systems: flashings, mounts, rails, and clamps.
Flashings protect your roof from water damage. They seal the areas where installers drill holes for roof attachments. Without proper flashings, you’d face roof leaks that compromise your home’s structure.
The solar panel mounting bracket connects to your roof with bolts. These mounts work on various surfaces, including mounts for flat roofs. They create a solid foundation for the entire system. The material durability of these brackets determines how well they withstand extreme weather conditions over decades of use.
Rails run across the mounts and provide pathways for panels and wiring. Made from lightweight aluminum, they guarantee durability and structural integrity.
Clamps hold panels firmly to the rails. You’ll see two types: mid clamps between panels and end clamps at the edges.
Types of Roof Mounts for Different Roof Styles
How do installers choose the right mounting system for your roof? They’ll match specific types of roof mounts to your roof’s design. For pitched roofs, they’ll use rail systems like IronRidge’s XR series. These mounting solutions secure panels at fixed angles.
Flat roofs need different rooftop solar systems. Installers often pick ballasted mounts from companies like Unirac. These don’t penetrate your roof and can adjust panel angles. These weighted blocks eliminate the need for drilling while keeping panels securely in place during normal weather conditions.
Metal roofs make solar panel installation simpler. Special clamps attach directly without rails. Tile roofs require custom mounts with flashing to prevent leaks. Asphalt shingle roofs use rail systems too. Installers drill into rafters and seal everything properly.
Each roof style needs its own mounting approach. The right system keeps your panels secure while protecting your roof.
Pre-Installation Site Assessment and Planning Requirements
Before any mounting system gets installed, professional crews must evaluate your property thoroughly. A licensed solar installer conducts a pre-installation site assessment with structural engineers. They’ll check if your roof’s structural integrity to withstand added weight meets building codes and safety requirements.
The site survey includes measuring available space and identifying shading issues from trees or buildings. Installers examine your roof condition for damage or leaks. They’ll determine areas with maximum sunlight exposure throughout the day.
You’ll need at least 10-15 years of roof life remaining. Crews calculate exactly how many panels fit while maintaining proper spacing. Different mounting systems vary in weight and structural requirements, so installers factor these specifications into their calculations. Before work begins, installers handle collecting necessary permits from local authorities. They’ll clear debris and set up fall protection equipment. This detailed planning guarantees your installation meets all regulations.
Permits and Building Code Compliance for Solar Installations
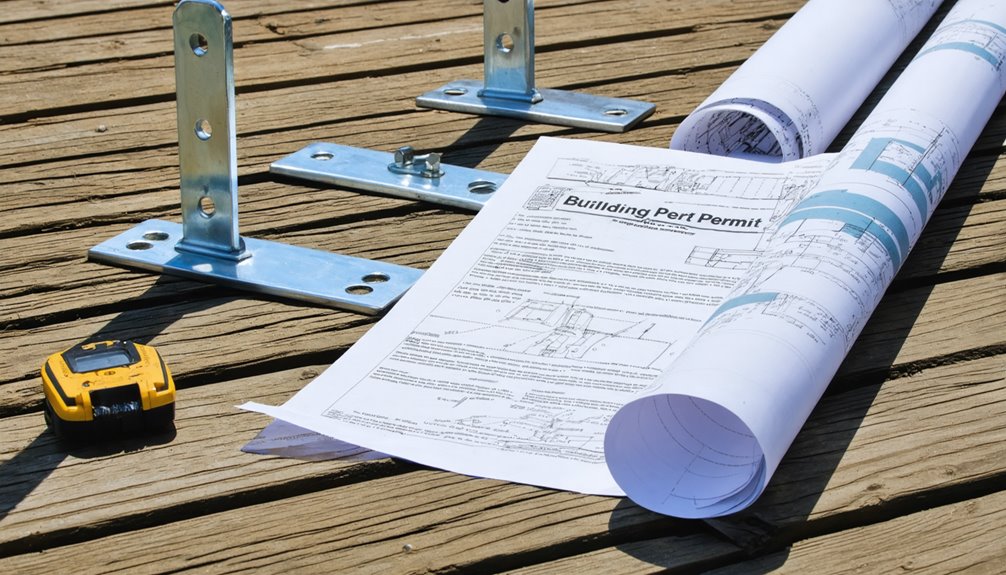
When you’re ready to install solar panels, you’ll need proper permits from your local government first. Building code compliance isn’t optional – it’s required by local authorities everywhere. You’ll submit detailed installation plans with diagrams and specifications. These documents show how your system meets regulations.
Your utility company must approve grid connection agreements before permits get issued. The National Electrical Code sets safety standards you’ll follow. Inspectors will check your work during and after installation. They’ll verify everything meets required standards.
Non-compliance creates serious problems. You’ll face fines and project delays. When you sell your home later, missing permits can block the sale. Previous owners have lost thousands fixing permit violations. That’s why following rules matters from the start. Understanding structural engineering requirements for both roof and ground mount systems helps ensure your installation plans meet all necessary building codes and safety standards.
Step-by-Step Roof Mount Installation Process
You’ll need to complete several safety checks before starting your roof mount installation, including examining the roof’s structure and checking for electrical hazards. The mounting rails must be attached directly to the roof rafters using special drilling techniques and waterproof flashing to prevent leaks. Panel securing involves positioning the solar panels on the rails and using clamps to lock them in place so they won’t move during storms or high winds. While roof mounts are popular, pole mount systems offer superior adjustability for optimal sun exposure compared to fixed roof installations.
Pre-Installation Safety Checks
As homeowners prepare to install solar panel roof mounts, safety checks serve as the critical first step in the installation process. You’ll need to verify your roof’s structural integrity before moving forward. A licensed installer or engineer checks if your roof can handle the extra weight. They’ll conduct a thorough roof inspection for damage or weak spots.
| Safety Check | Why It’s Important |
|---|---|
| Structural Assessment | Prevents roof collapse |
| Damage Inspection | Avoids future leaks |
| Debris Clearance | Maximizes solar exposure |
| Building Permits | Meets local building codes |
| Fall Protection Setup | Prevents worker injuries |
Safety measures include setting up fall protection systems for workers. You must obtain proper permits before starting. Clear any debris from your roof’s surface. These precautions verify a safe, legal installation that protects both workers and your property.
Mounting Rail Attachment
Homeowners mark their roof rafters first before drilling any holes for the mounting system. They’ll find the rafters’ exact locations and mark these spots carefully. After drilling holes at the marked points, they’ll place secure roof attachments using the right fasteners. These attachments need flashing to prevent water leaks.
Next, they’ll install mounting rails onto these secured attachments. The rails must be level and have the correct orientation to optimize solar panel performance. Workers check everything’s straight using a level tool.
Module clamps come into play when it’s time to attach the solar panels to the rails. Throughout this process, installers follow strict safety measures. They’re wearing fall protection gear while working on the roof. Each component needs to be stable and secure.
Panel Securing Methods
Module clamps serve as the primary method for securing solar panels to mounting rails. You’ll find two types: mid clamps and end clamps. These components connect panels directly to the mounting system that’s attached to secure roof attachments.
When installers position module clamps, they’re making certain panels won’t move during storms. The clamps work with the mounting rails you’ve already installed. They’re typically made from durable aluminum materials, matching the rails’ construction.
Proper clamping helps optimize angles for maximum solar energy production. Each clamp must meet specific torque requirements. This guarantees safety and compliance with building codes.
Once you’ve secured all panels, inspectors check that every connection meets local standards. They’ll verify that both the clamps and the entire mounting system can handle expected weather conditions.
Electrical Connections and Wiring Best Practices
You’ll need to select the right wire gauge for your solar panel system based on the distance between panels and the amount of current they’ll carry. Your system must meet strict grounding safety requirements to protect against electrical shocks and equipment damage during storms. Most residential solar installations use 10 or 12 AWG wire for panel connections and require proper grounding rods installed at least 8 feet deep. For optimal system performance, ensure your wiring connects to a grid-synchronized inverter that can efficiently convert DC power from your panels to AC power for your home.
Wire Gauge Selection
When connecting solar panels to your home’s electrical system, the wire’s thickness plays an essential role in how well electricity flows. Experts report that 10 to 12 AWG wires work best for typical solar panel systems. These sizes guarantee efficient energy transfer while keeping voltage drop below 3%.
| Distance | Wire Gauge | Voltage Drop |
|---|---|---|
| Under 25ft | 12 AWG | Less than 1% |
| 25-50ft | 10 AWG | 1-2% |
| 50-100ft | 8 AWG | 2-3% |
| 100-150ft | 6 AWG | Under 3% |
| Over 150ft | 4 AWG | Under 3% |
The National Electrical Code requires UV-resistant cables like PV wire for outdoor installations. These special wires won’t break down in sunlight. Following proper wire gauge selection standards guarantees safety and compliance with local codes.
Grounding Safety Requirements
After installing the correct wire gauges, proper grounding becomes the next critical safety step in solar panel installations. Grounding protects solar panel systems from electrical shock and damage. It works by connecting the system to Earth through a grounding rod or wire. This connection safely sends excess electricity into the ground.
The National Electrical Code requires specific grounding methods for solar installations. All exposed metal parts need proper electrical connections to prevent hazards. Installers attach grounding lugs or clamps to panel frames. They’ll use corrosion-resistant materials that meet safety standards.
Weather can damage grounding connections over time. That’s why regular inspections help maintain electrical integrity. Extreme storms especially impact these systems. Quality materials and proper installation create reliable, long-lasting protection for solar equipment.
Safety Protocols and Equipment for Roof Installations
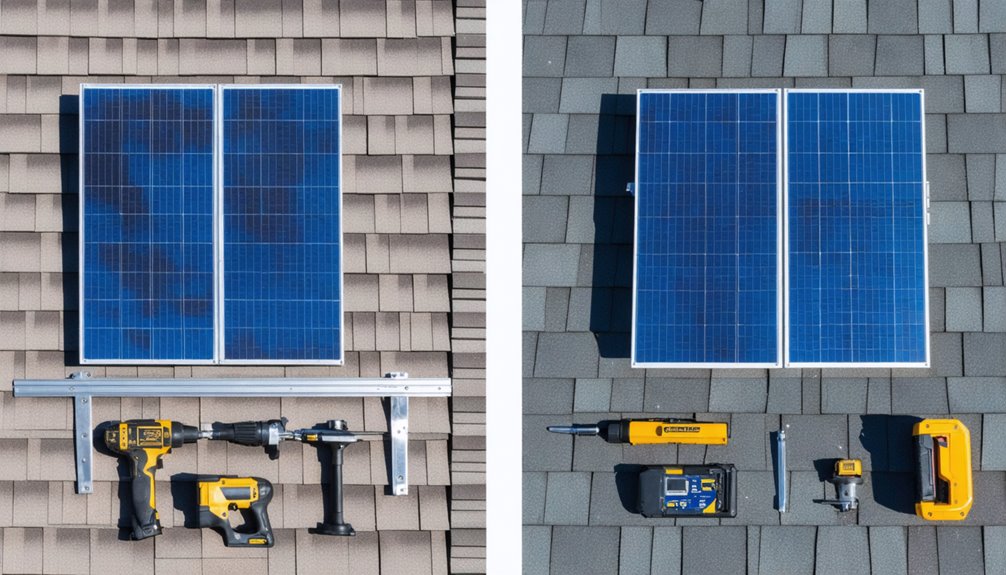
Before stepping onto any roof, solar installers must wear specific safety gear that protects them from serious injuries. They’ll need personal protective equipment including hard hats, safety harnesses, and non-slip shoes. Installers set up fall protection systems like guardrails or safety nets around work areas. They check the stability of ladders and scaffolding before climbing.
Teams conduct pre-installation safety briefings where they review emergency plans. Everyone learns their specific roles for safe roof installations. Workers spend time inspecting safety equipment before each job. They examine harnesses and helmets to verify everything meets current standards. These protocols help installers work safely at dangerous heights while mounting solar panels.
Professional Installation Vs DIY Considerations
Solar panel owners face a major decision about who’ll install their roof mounts. Professional installation brings several advantages over the DIY approach. Licensed installers have the skill and experience to guarantee the installation goes off without a hitch. They’re trained in local regulations, which helps avoid compliance issues with building codes.
Professionals complete solar panel mounts much faster than homeowners doing it themselves. This time efficiency means your system starts generating power sooner. They also provide warranty and support for their work and equipment.
While DIY seems cheaper initially, mistakes can lead to costly repairs. Professional installers know proper mounting and wiring techniques that maximize your system’s performance. Their expertise often prevents expensive errors that first-time installers might make. Many professionals use pre-configured kits that include engineered mounting solutions, which streamline the installation process and ensure compatibility between all components.
Maintenance and Inspection Guidelines for Roof-Mounted Systems
How often should you check your roof-mounted solar panels? Experts say you’ll need regular maintenance at least twice yearly. These inspections help spot problems early and keep your solar panel system running well.
| Task | Frequency | Purpose |
|---|---|---|
| Full inspection | Twice yearly | Check connections and durability |
| Cleaning panels | Every 6 months | Remove dirt affecting performance |
| Shading check | Seasonally | Verify no new obstacles |
| Electrical review | Annually | Test all connections |
| Documentation | Every visit | Track maintenance history |
Dirty panels can’t produce as much power. Studies show dust and bird droppings cut energy output by 25%. You’ll also need to watch for tree growth creating shading problems. Roof-mounted systems face weather daily, so loose parts and worn components are common issues inspectors find. While fixed roof mounts provide stability, adjustable panel mounts can boost solar output by up to 25% by allowing seasonal angle optimization.
Cost Breakdown and Budget Planning for Roof Mount Systems
When homeowners plan to install solar panels, they’ll find mounting equipment costs about $1,000 for a typical $10,000 system. This mounting and racking components price represents 10% of the total project. Professional installation adds another 10-15% to the cost breakdown.
Budget planning should include permit costs ranging from $50 to several hundred dollars. While rooftop systems don’t require extensive site preparation, ground-mounted alternatives cost $1,500-$3,000 more. Many homeowners set aside 20-30% of their total budget for unforeseen expenses during solar installation.
These extra funds help cover unexpected issues or upgrades. The mounting system’s cost remains consistent across most residential projects. Local regulations determine specific permit costs in each area. Understanding these expenses helps homeowners prepare realistic budgets for their solar projects. Selecting high-efficiency panels like the Jinko Tiger Neo or Trina Vertex models can maximize energy output and provide better long-term value despite higher upfront costs.
Conclusion
Solar panel roof mounts have become standard equipment for homeowners switching to renewable energy. You’ll find these systems on thousands of roofs across the country. They’re built to last decades with proper care. Installation requires specific tools, safety gear, and often professional expertise. Most installations take one to three days. Regular inspections help prevent problems. As solar technology advances, mounting systems continue improving too. They’re now stronger, easier to install, and more weather-resistant than ever before.